Render pipeline behind Refract
Looking at these icons, did you ever get fascinated by these little shiny, tinted glass pieces?
Today I want to share the render pipeline behind Refract and also behind Apple!
The art of the glass
What is actually glass? Hard, transparent and tinted pieces with light are glass. Almost opaque, frosted pieces like acrylic are also glass. It’s so variable! So let’s abstract the properties from them. Blur, translucency, refraction, shadow and tint.
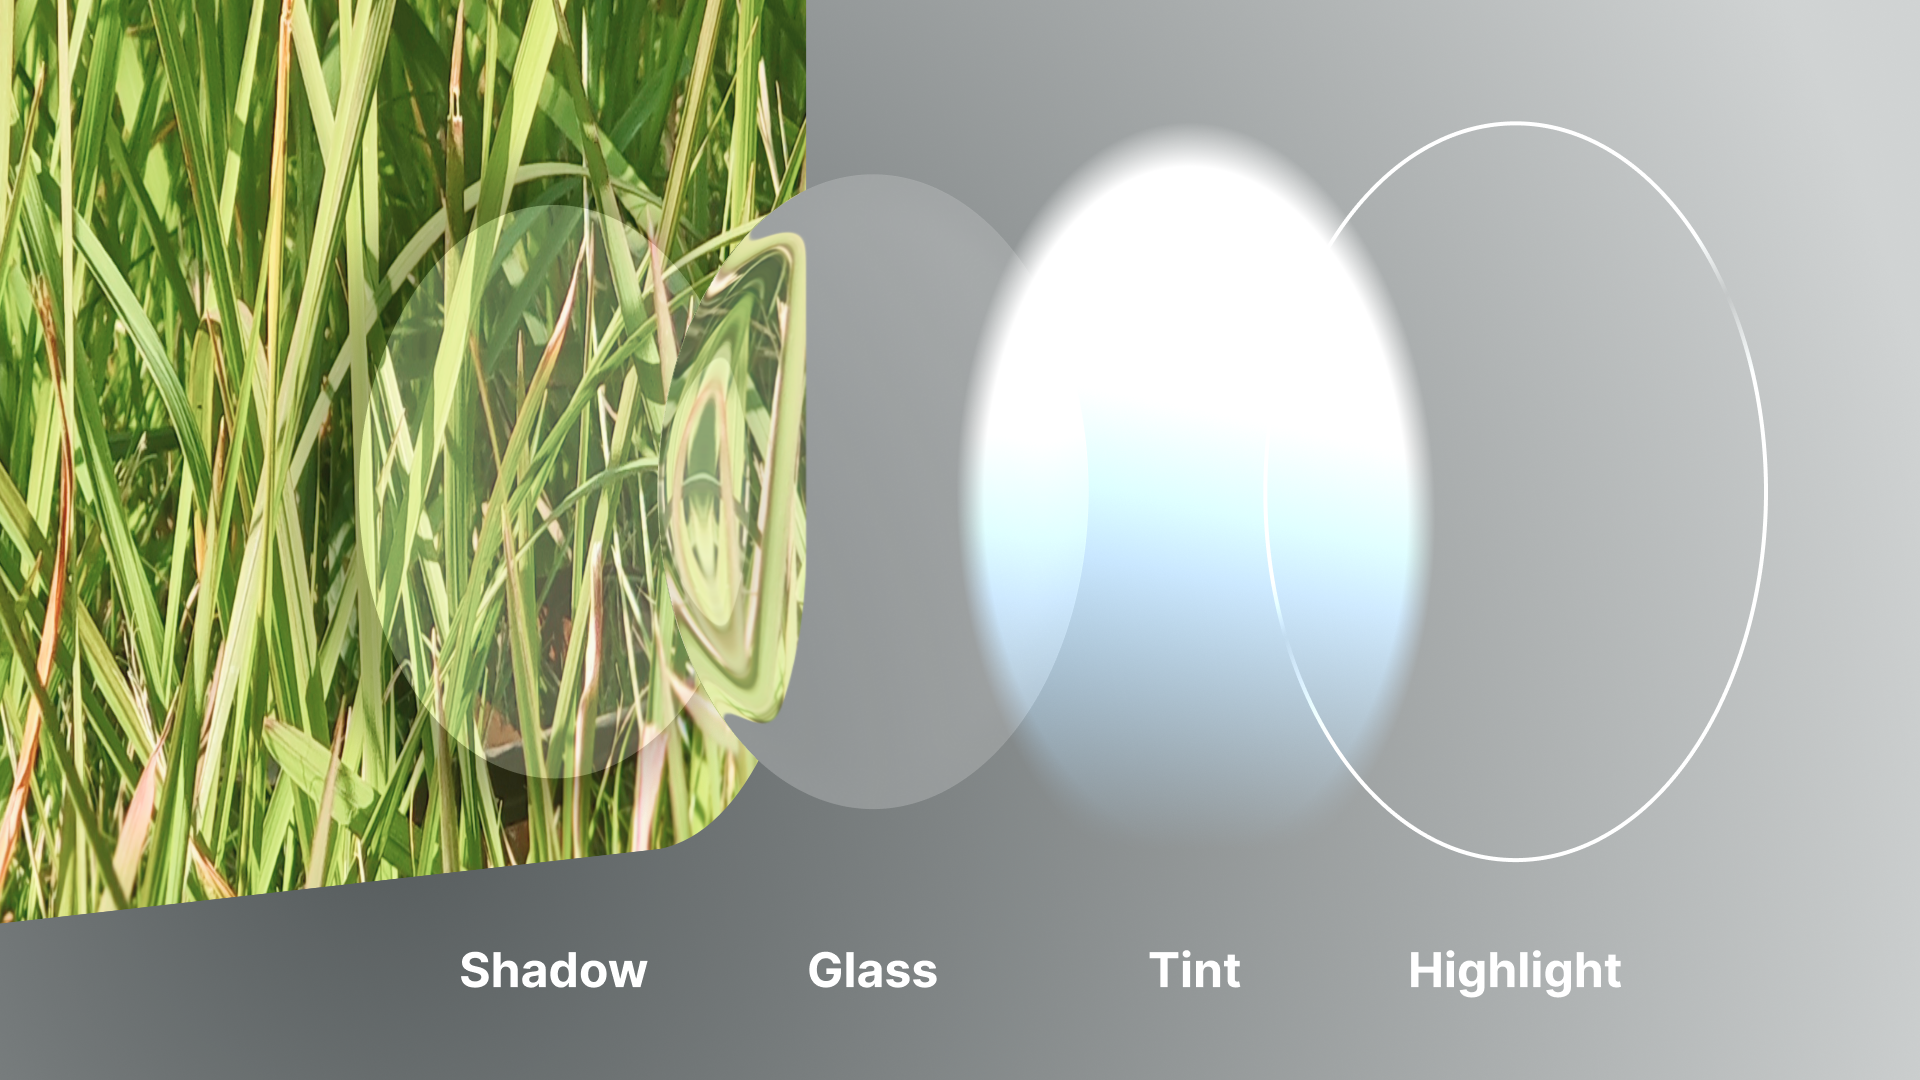
So I decided to separate one glass into 4 layers. From the back to the front, they are: shadow, backdrop, tint and highlight.
-
The shadow layer draws the soft volume under the shape. Sometimes it is a neutral dark shadow, and sometimes it borrows the layer color, because colorful glass should not always cast a boring grey blob.
-
The backdrop layer takes in everything behind this glass, blurs it if the material is frosted, then refracts it along the edge.
-
The tint layer uses the proper color of the asset, or the color you set in the inspector, applies the translucency effect, and creates volume with alpha.
-
And the highlight layer provides the ambient and subtle light on the asset. It is small, but without it the glass immediately becomes flat plastic.
This is my definition. But a definition cannot render pixels. We still need to answer a cruel question: where is the edge, and which direction should the light bend?
Reviewing (or previewing) time
How can we achieve such a beautiful effect? Some people might vividly remember geometric optics from high school physics: angles of incidence, refractive indices, and so on.
In the real world, light bends because it travels through different materials. The famous rule is Snell’s law:
Beautiful, elegant, and absolutely not the thing I want to run for every pixel of every icon preview.
But the idea still helps. If I know the surface normal of the glass, I can use it to fake the direction of bending. If I know the light direction, I can decide which edge should glow. These two small vectors are enough to create most of the feeling.
And here comes one of my favourite tiny math tools: the dot product.
When both vectors point in the same direction, the value is large. When they are perpendicular, it is around zero. When they oppose each other, it becomes negative.
So the highlight shader just compares the edge normal with the light direction, then turns that into a soft white rim.
Computer graphics are not terrifying
For a shape, the alpha mask only tells us one thing: this pixel is inside or outside. But glass needs more than that. It needs to know how far a pixel is from the edge, and the direction from this pixel to the edge.
That is why we need an SDF (Signed Distance Field) bitmap.
In the renderer, the shape first becomes an RGBA mask. Then the GPU runs a Jump Flood Algorithm pass. The first pass seeds every boundary pixel with its own coordinate. After that, the flood pass keeps jumping across the texture with smaller and smaller steps, spreading the nearest boundary coordinate to the whole image.
It feels a little magical: instead of checking every boundary pixel one by one, the shader only needs about rounds.
The SDF texture stores inside distance, outside distance and coverage.
Now refraction becomes a very small formula:
In human words: bend the backdrop strongly near the edge, and almost do nothing deep inside the glass. That is not real physics, but it reads like a beveled transparent object, and this is the whole point.
By the way, if we directly take the gradient from the raw JFA result, the edge normal becomes noisy. Curved SVGs start to show broken bands, just like the renderer suddenly forgot how curves work.
So Refract blurs only the inside-distance channel before calculating the normal. The coverage stays sharp, because anti-aliased edges should still look crisp. Then a Sobel-like gradient gives the normal for every pixel.
Render, and render fast
Before actually writing the renderer, we need to define the composition pipeline. Imagine the GPU as a waterfall: we need to provide all the ingredients on time.
One glass layer is rendered like this:
graph LR
    subgraph BG ["Backdrop"]
        Background["Background"] --> Blur["Gaussian Blur"]
        Blur --> Backdrop["Glass Backdrop"]
    end

    subgraph Core ["SDF"]
        Shape["Shape Body"] --> JFA["JFA"]
        JFA --> SDF["SDF"]
        SDF --> Gradient["Smoothed Gradient"]
    end

    subgraph Effects ["Tint & Highlight"]
        ShapeColor["Shape Color"] --> Tint["Tint Layer"]
        Highlight["Highlight Layer"]
    end

    subgraph BM ["Shadow"]
        ShadowSource["Shadow Source"] --> ShadowBlur["Shadow Blur"]
        ShadowBlur --> Shadow["Shadow Resolve"]
    end

    Gradient --> Backdrop
    Gradient --> Tint
    Gradient --> Highlight

    Shape --> ShadowSource
    SDF --> ShadowSource

    Backdrop --> Composite["Composite Output"]
    Tint --> Composite
    Highlight --> Composite
    Shadow --> Composite
But in practice, changing the light angle would trigger a full recomputation of every layer, causing noticeable stutter, feeling like buying a new kitchen every time we want to make a cup of coffee. So we need to ask: how can we make rendering fast?
From the pipeline above, it’s clear that some passes are expensive:
- JFA Pass: Once a shape is placed, the SDF should never change—regardless of light angle or tint color, the distance field of this shape remains identical.
- Shadow Pass: It depends on radius, opacity, color, and whether it borrows the layer color—but not on the background content. As long as these parameters stay the same, the shadow can be reused.
And the frosted glass effect also uses a classic trick. A real 2D Gaussian blur is expensive, so the shader runs it twice: horizontal first, vertical next. Each pass uses 33 taps. It is still smooth, but much cheaper than a full square kernel.
The initial renderer ran every layer from start to finish in a queue, which was clearly not satisfying. So we needed to rethink the architecture—what can be cached, and what can be parallelized?
What can be cached:
- Shape SDF and distance gradient: permanently reusable as long as the size and SVG path remain unchanged
- Shadow textures: reusable when parameters are unchanged
- Background blur: only needs recomputation when the background content actually changes
What can be parallelized:
- Multiple glass layers can prepare their SDFs simultaneously (submitted in the same command encoder)
- Shadow computations for different layers are independent of each other
- Highlight computation is purely based on the normal map and requires no waiting for other layers
Caution: there is one exception! The backdrop cannot simply be cached or parallelized because each layer’s backdrop depends on the composite result of all layers beneath it. This means you have to wait for the lower layers to finish rendering before you can blur and refract the current layer.
Based on this analysis, we restructured the renderer into three stages:
-
Preparation
Collect all glass layers that need rendering, check the cache for SDF and shadow hits, and submit JFA and shadow computations for any uncached layers. -
Composition
Draw layers from bottom to top, one by one. Each layer first samples the prepared background (with blur applied), then composites the tint and highlight on top. -
Cleanup
Release temporary textures and uniform buffers to avoid memory leaks.
This strategy works remarkably well in practice. Finally, we can change the light angle and see it render smoothly. Those little glass pieces now look confident on the screen, but behind them is a carefully orchestrated rendering pipeline.
Well done, we walked along the path together. And if you’re interested in Refract, feel free to explore the source code on GitHub.